
Publish a flat file into NetiLab
What will you learn
Create new NetFlow process from the template
Run created process and upload a csv data
Check uploaded data in NetFind
After reading this example you should be familiar with creating new process from template and observing the results in NetFind search engine.
Prerequisites
Basic understanding of NetFlow processes module. If you are not familiar with this read Processes and Create new process pages.
Basic understanding of NetFind module. Read some of NetFind pages like Application structure to get familiar with NetFind.
Enough permissions to create process from template and access NetFind module.
Introduction
In many scenarios, there are multiple flat files(csv, txt, excel, etc.) located in scattered across an organization. When trying to anlyze such data and compare it with other data sources (other files, database tables, etc.) or share it with coworkers, many technical problems can disrupt this process.
For example a file may be lost, or different versions of a file exists. On the other hand it is impossible to compare the content of the file with some existing data that is stored in a database.
This example will demonstrate, how a flat file can be uploaded (and transformed if needed) in the NetFind module. Using this, sharing, visualizating and comparing is much easier. On the other hand, data is also stored in the database where it is kept save.
This example can easily be extended to include more complex transformations and data destinations. We will use only a simple procedures so that the entire process will be easier to understand.
Example description
Our task will be to upload a csv file containing data about crypto values for different coins for some previous years. The data set was available in https://www.kaggle.com/datasets/bishop36/crypto-data url. If url is not working any more you can access csv file directly Crypto.csv .
File will be uploaded into NetFlow process, which will parse the csv file into table format and determine the data types of the columns. Afterwards it will import this data into NetFind view. This in turn imports the data into an elasticsearch index and creates a view in NetFind that interacts with that index. You can then perform some basic visualizations or filter and share resulting data via sharable url.
Steps
Step 1 - Creating import process from template
Go to NetFlow module and open navigation menu by clicking ![]() icon. Then click on
icon. Then click on ![]() button. A pop up window with process templates should open up.
button. A pop up window with process templates should open up.
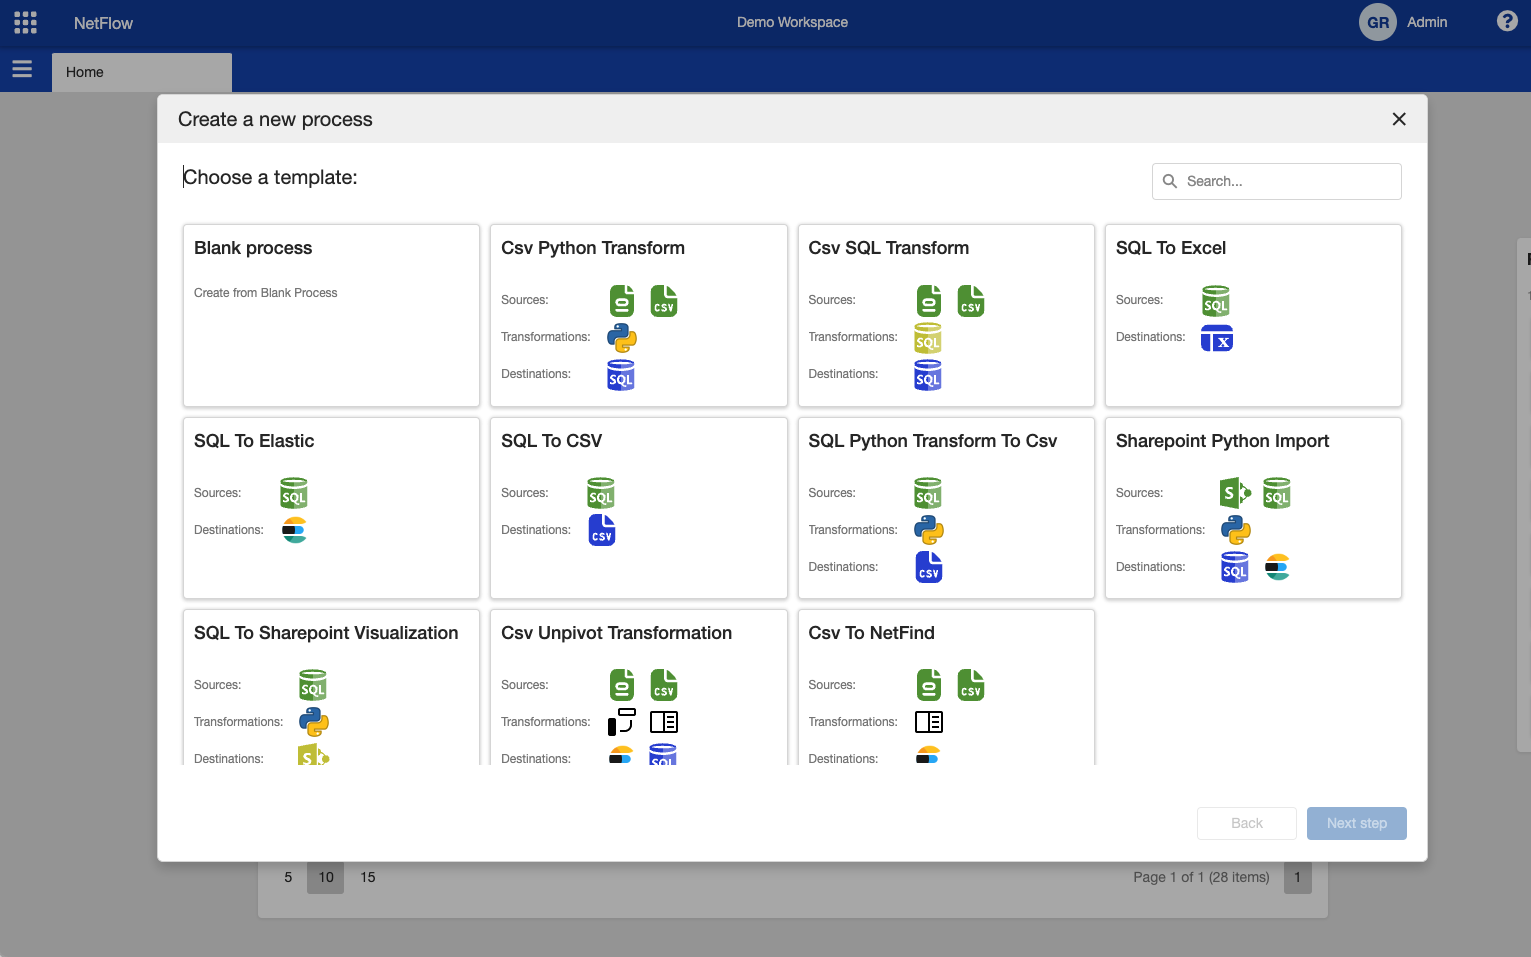
Process template selection.
Select Csv To NetFind template and click on Next Step button. In the next step you need to fill in process name and select process group. Also some template configurations needs to be set up. Since this is a very easy process template there is only one configuration that needs to be set. This is Elastic Index Name, which is the name of the index that will be created inside elasticsearch and also the name of the view in NetFind. Note that the view in NetFind can be changes latter but the index in elasticsearch can not be changed.
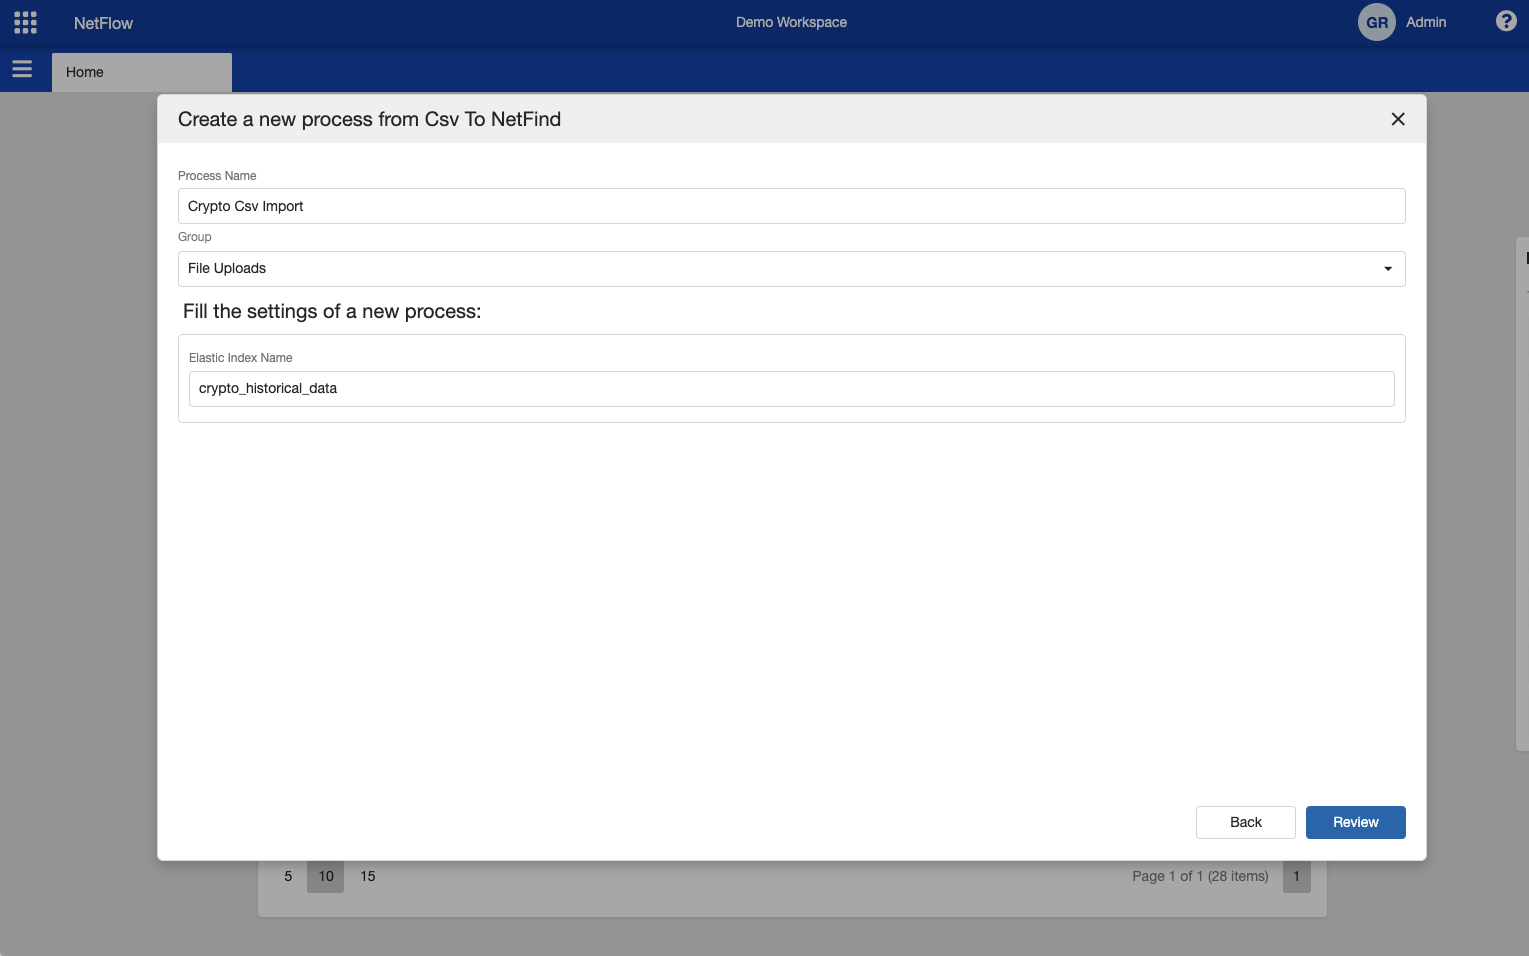
Process template settings.
Then click on Review button and review selected configuration. Afterwards click on Save button. This will create a new process and you should be redirected to the newly created process page (either process dashboard or instance page).
It is possible that this template does not exists in your workspace. If this is the case, and you would like to use this template please contact the support team.
Step 2 - Running created process
If everything was set up correctly you are ready to run the process and upload crypto csv data. To do so click on Run new instance button and new process instance will be started and stopped in the first (Upload Csv) node. Open the form by clicking on ![]() button and upload crypto csv file. Afterwards the file is uploaded click on Confirm button on the form.
button and upload crypto csv file. Afterwards the file is uploaded click on Confirm button on the form.
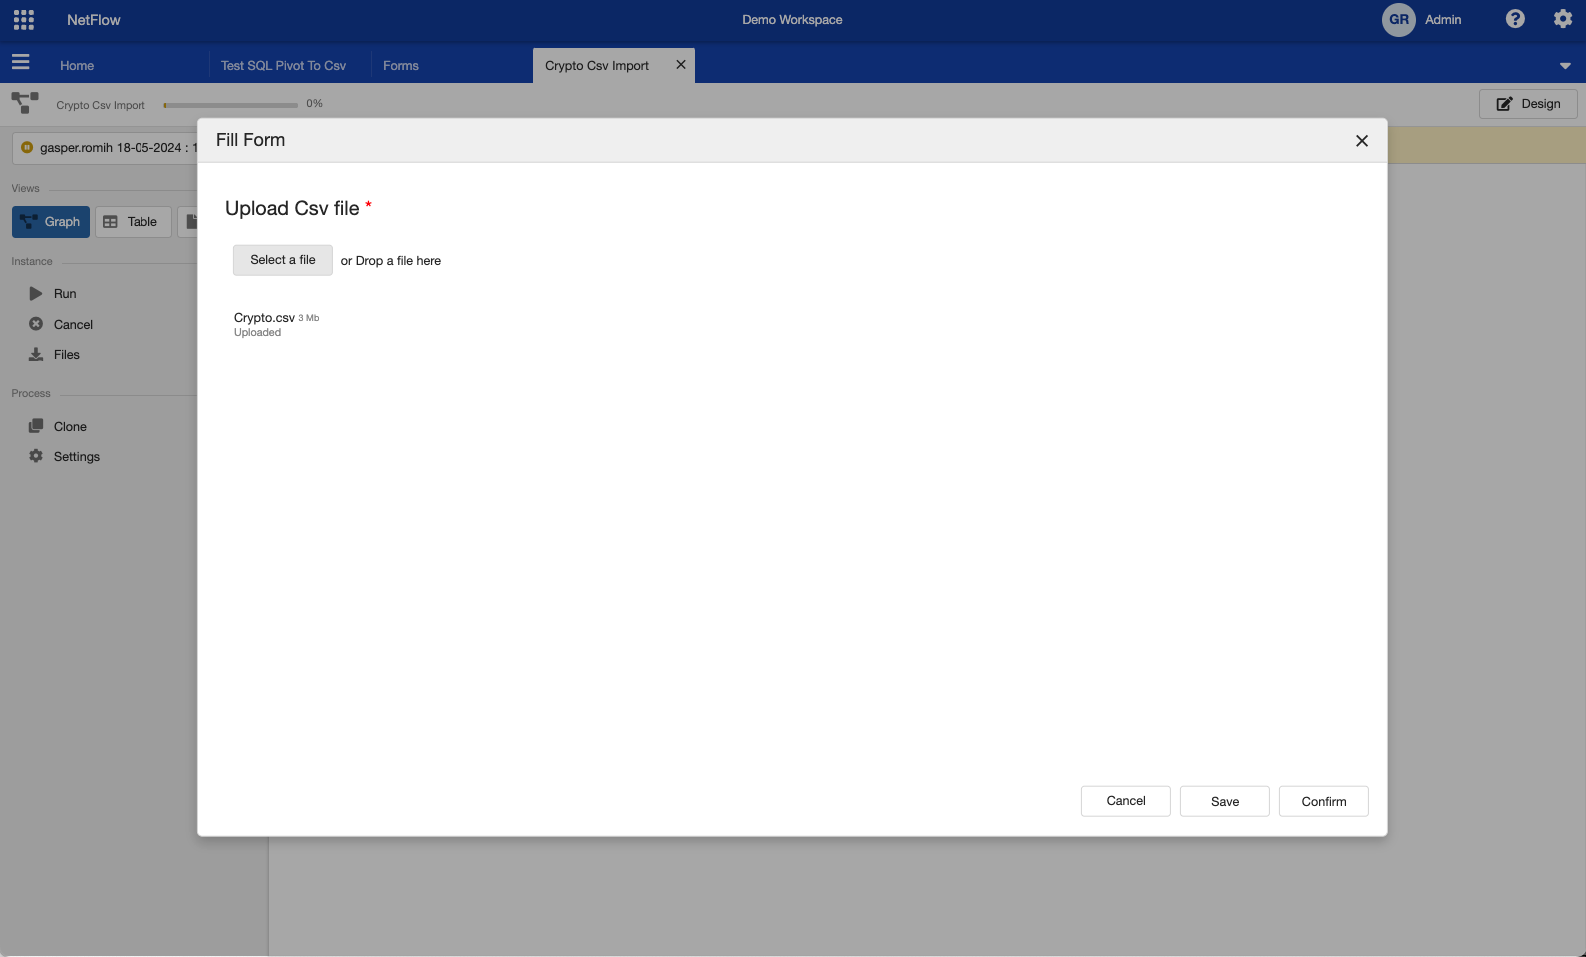
File upload form.
After the form is completed the process will automatically continue and it should complete successfully.
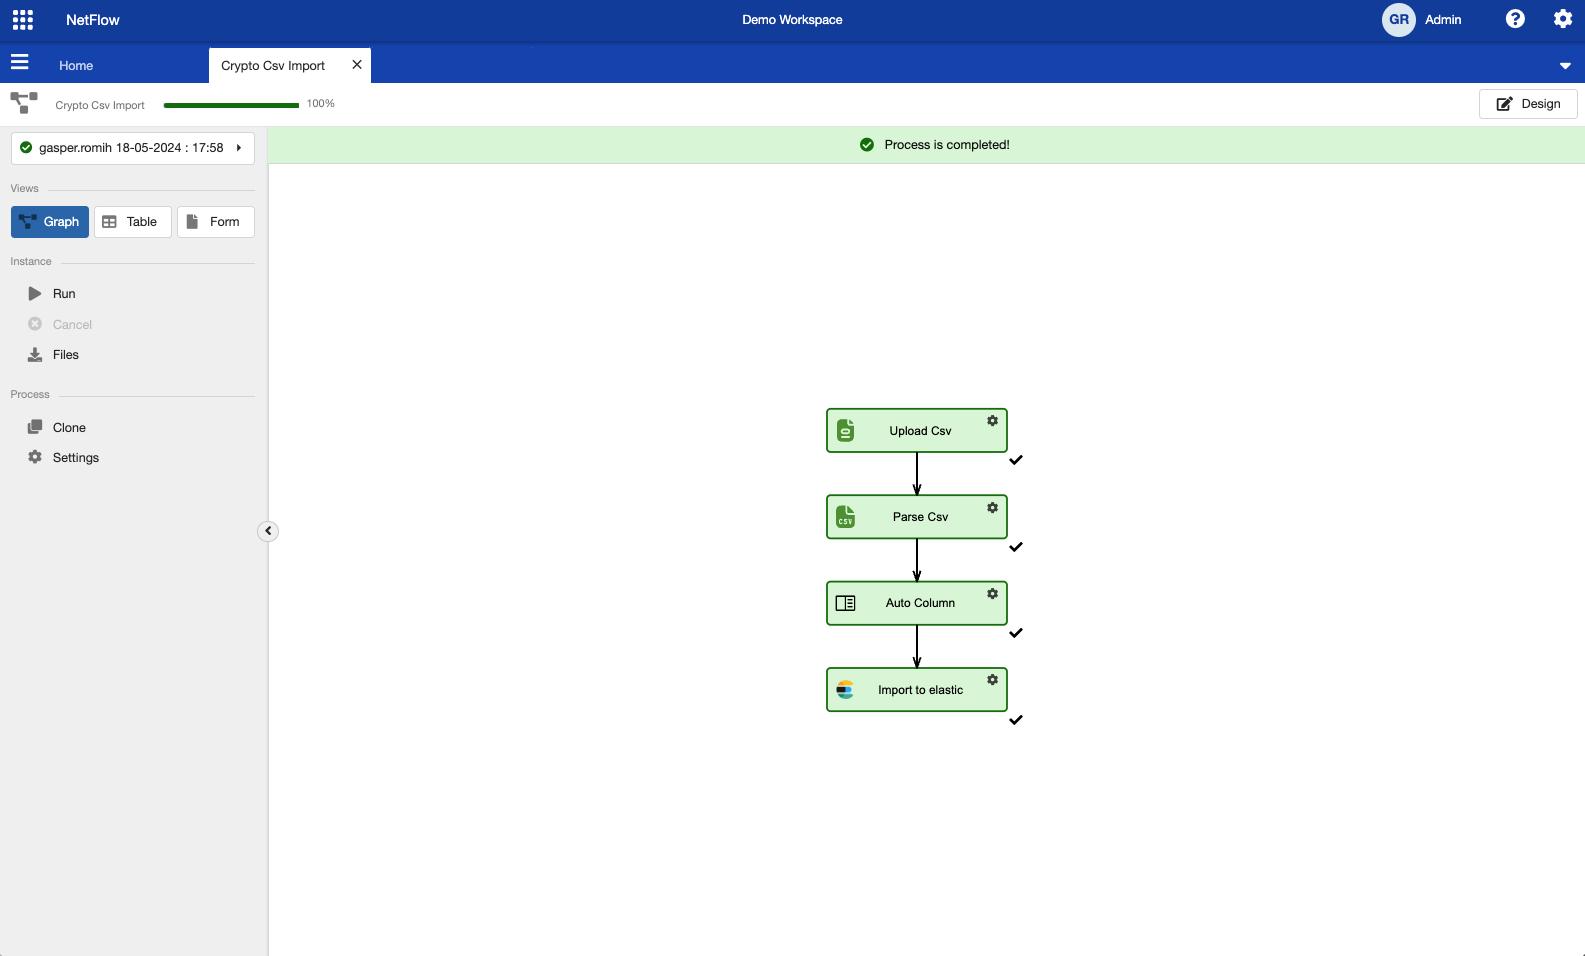
Successfully completed process
Step 3 - Inspecting results in NetFind
At this step the import process is successfully completed, meaning that the data was imported into elasticsearch and view was created in NetFind. Now switch to NetFind by clicking ![]() icon and selecting NetFind.
icon and selecting NetFind.
You will be redirected into NetFind home page. To inspect uploaded data click on menu ![]() icon and click on New Search button. This will open up an empty NetFind search and the view crypto_historical_data should be visible. Click on the crypto_historical_data to view its content.
icon and click on New Search button. This will open up an empty NetFind search and the view crypto_historical_data should be visible. Click on the crypto_historical_data to view its content.
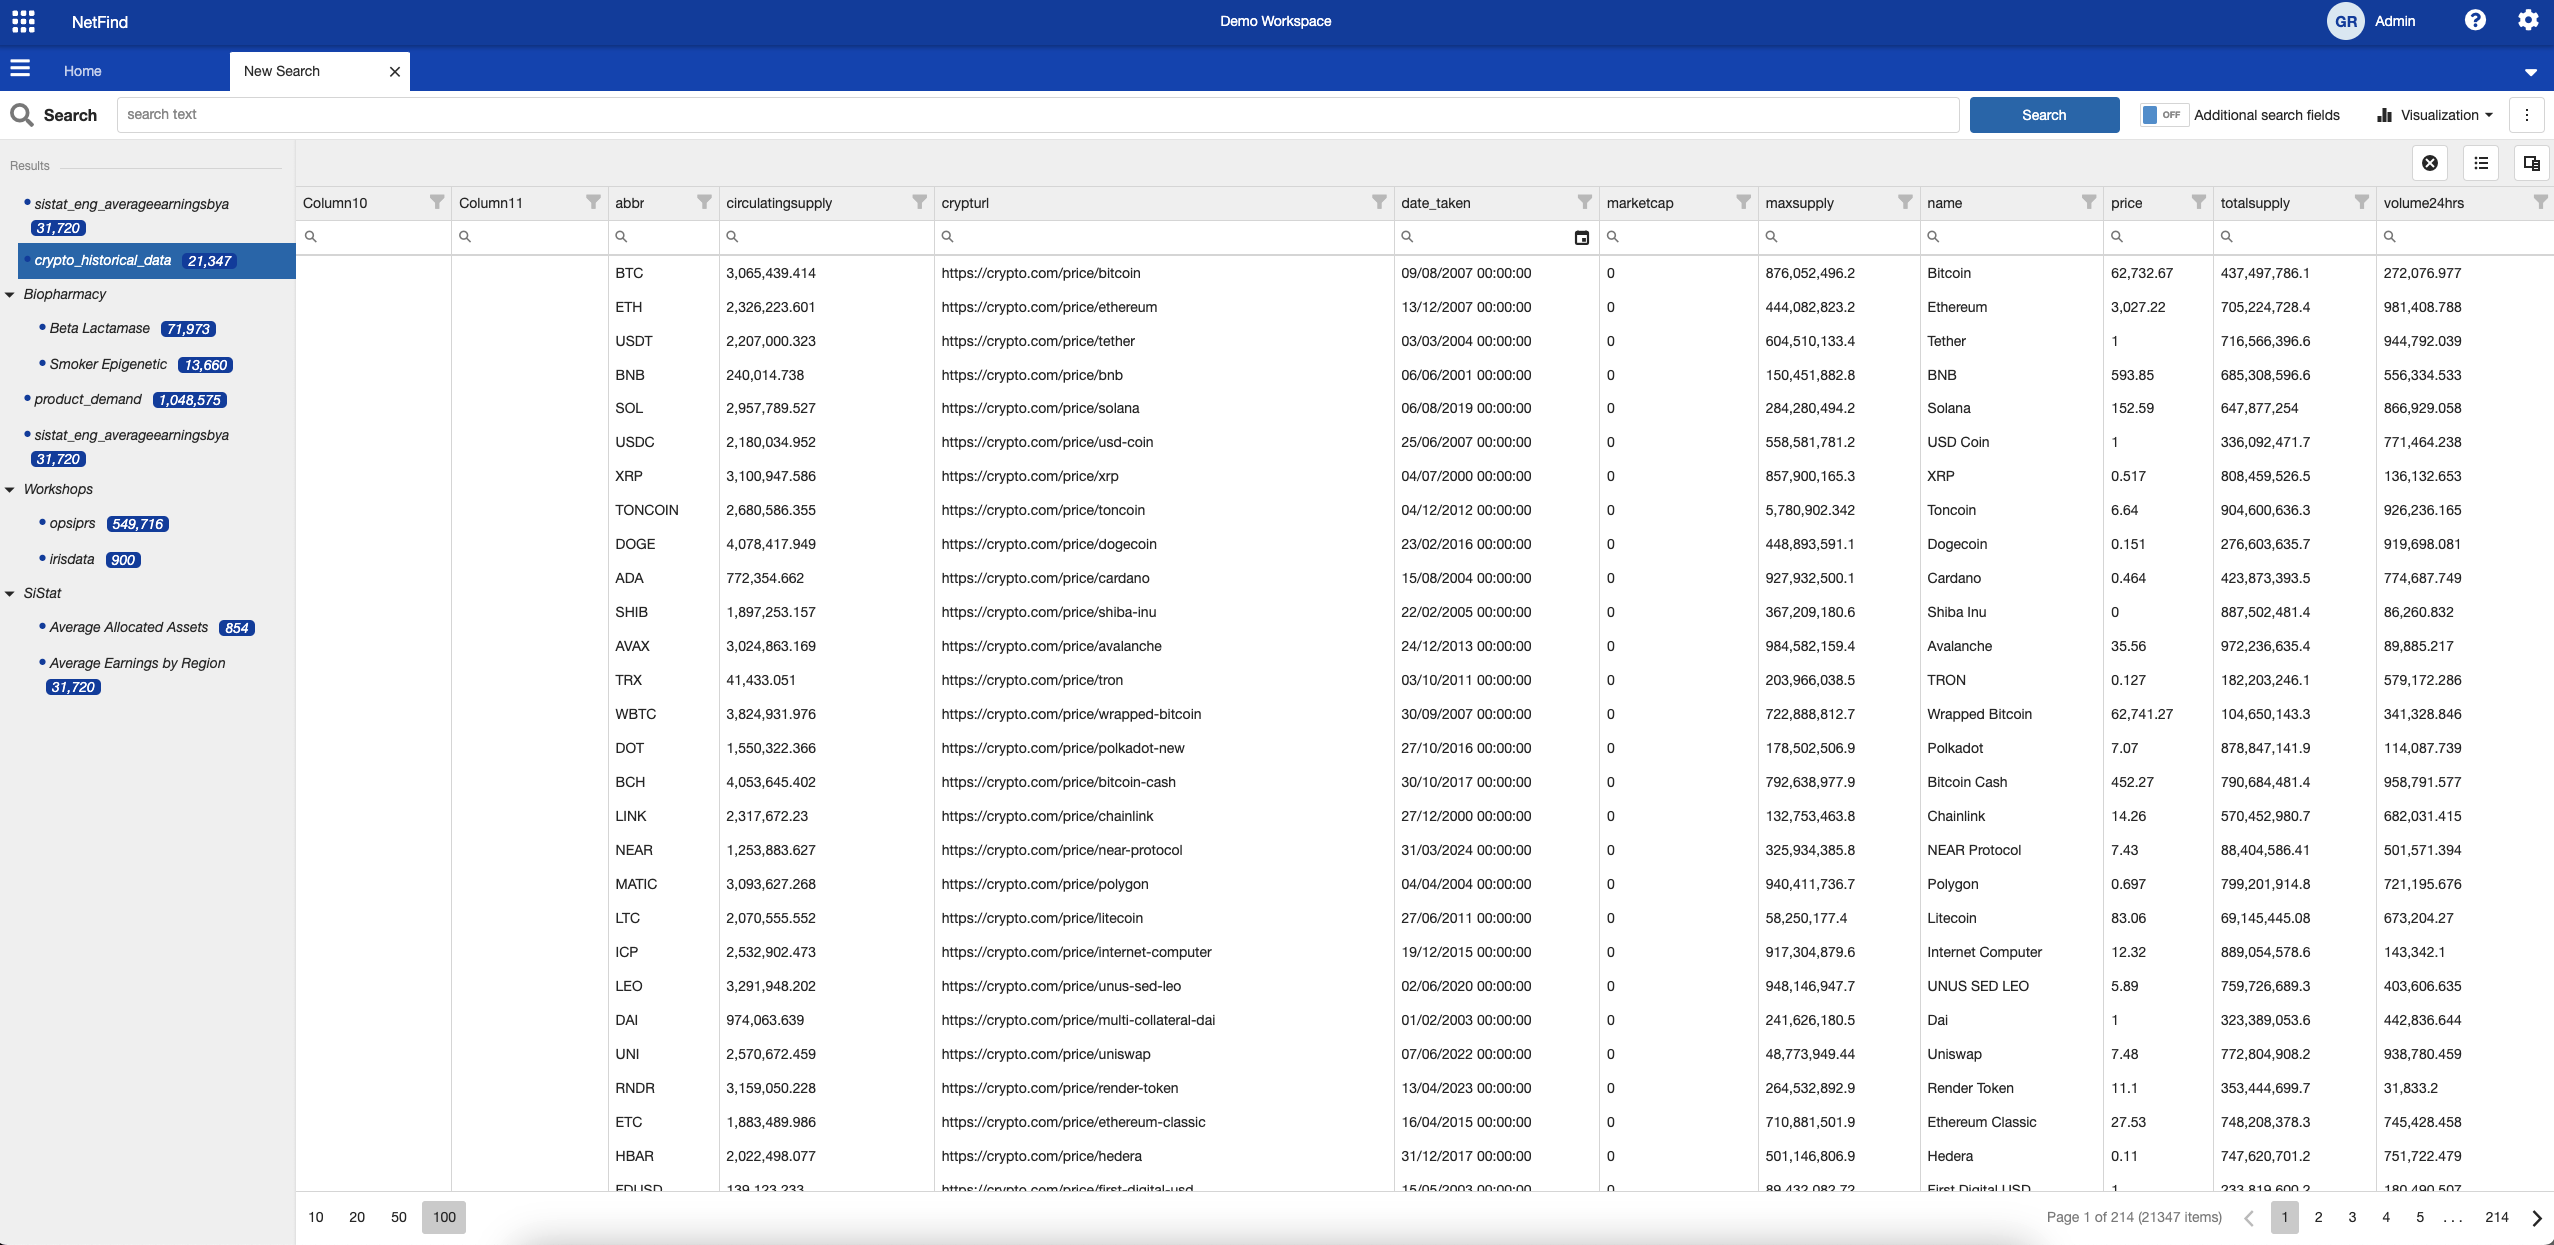
Crypto data viewed in NetFind.
Read pages in NetFind to see how to perform search, visualization or sharing of data in NetFind.