
Forms
Introduction
Forms inside NetFlow are special objects that can be created inside the application. Each form consists of multiple form elements that can either display some information or asks user for some additional input.
Form elements are:
text inputs
dropdown menus
date chooser
file upload
tree selects
datagrids
charts
and more…
Forms are mainly used to gather some additional data from the users and can be used inside the processes. There is a special Fill Form node that will stop the process (when executed) and wait for the user to complete the form. This can either be some manual file upload, manually entering data, validating data, etc. Each value that is entered in the form becomes part of process metadata and can be used by other nodes/steps in the process.
Form designer
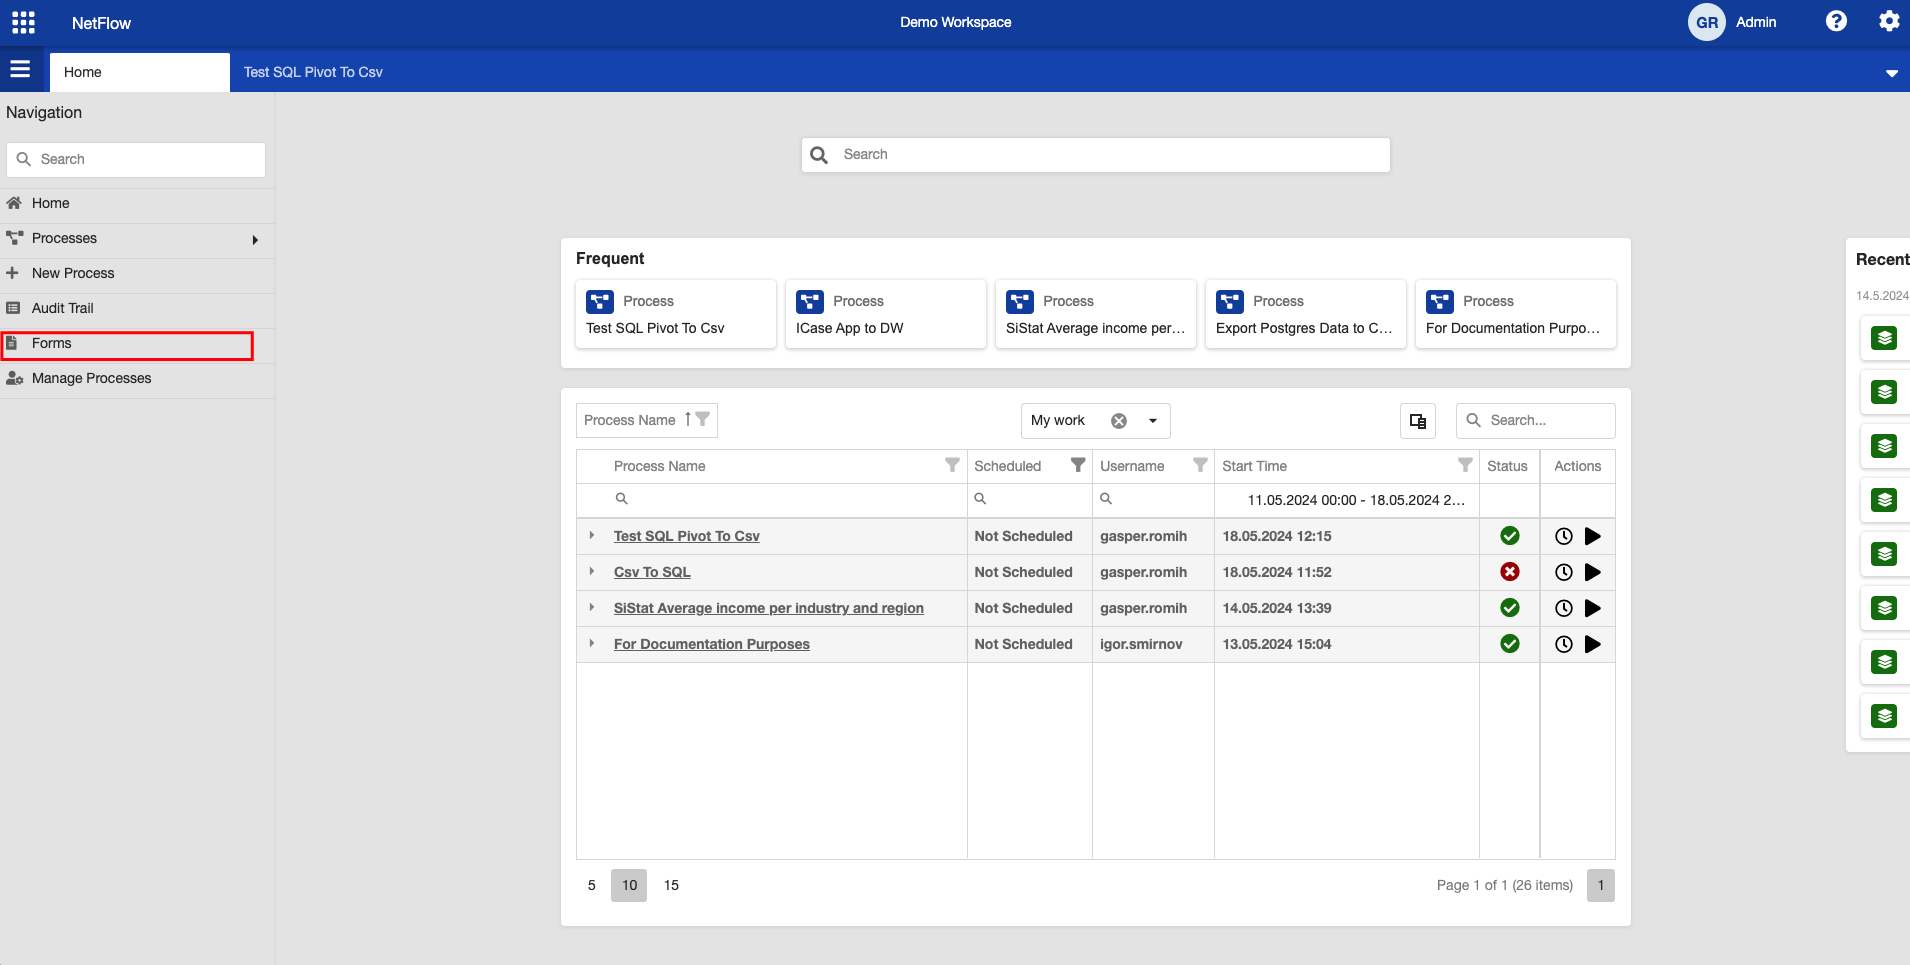
To create and/or modify existing form you need to open form designer. To do so click on menu ![]() icon in the left hand side and select Forms.
icon in the left hand side and select Forms.
A new tab with with forms will open up.
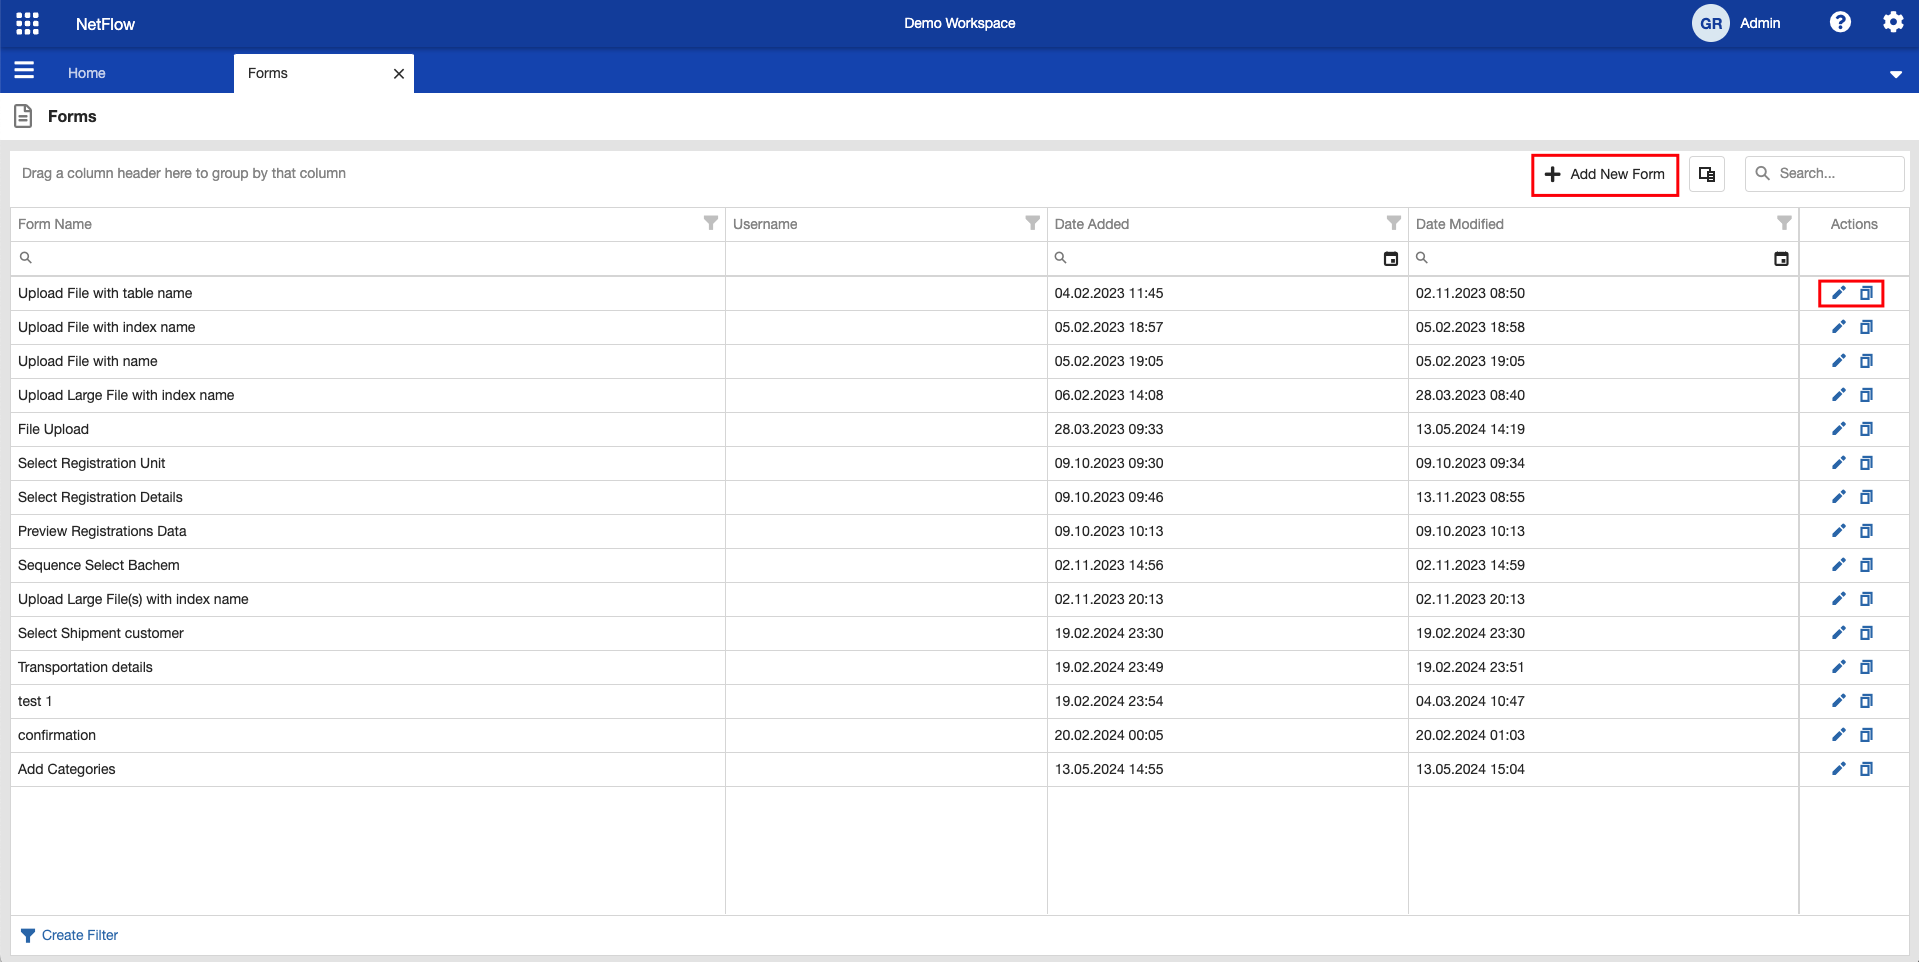
Forms tab.
Depending on your permission you will be able to:
Create a new form.
Modify existing form.
Clone existing form.
Creating a new form
To create a new form click on ![]() button at the top of a table. A form designer popup will open up.
button at the top of a table. A form designer popup will open up.
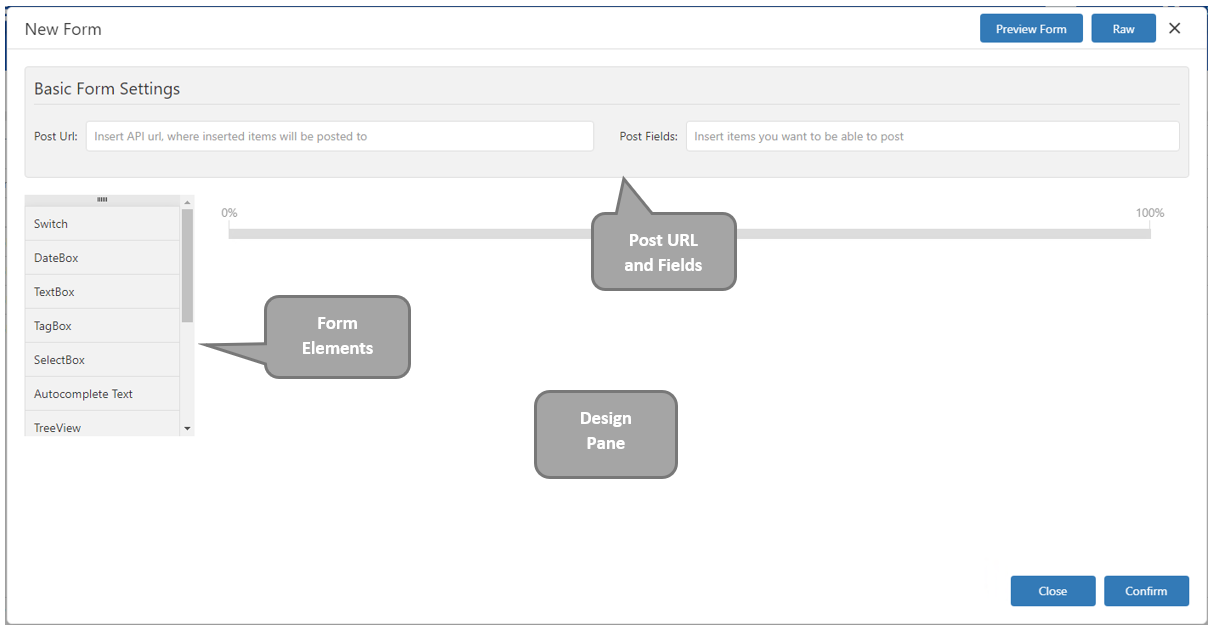
Form designer pop up.
Form designer consists of:
Form elements, which can be drag & dropped in design pane.
Design pane, which is used to design a form.
Post url and post field, which are used to send form to an external APIs
Adding a form element
To add a new form element into a form drag and drop it into design pane. A preview of an element will be inserted into the form. We will select Advanced Data grid and drop it into the form.

Advanced data grid, dropped into the design pane.
We would like to create a form with a table that displays some rows and it allows users to select some of its rows.
After the element is added to the design page it needs to be configured. Click on settings icon in right corner of an element will open up the settings for the element.
Fill in:
Entry ID: select_table
Entry Name: Select Data
Expand Initialization Settings and set:
Initialize type: table
Table Name: input_table
Expand Datagrid Settings → Basic Datagrid Settings and turn on Is Data Grid Selectable.
Then click Confirm button and Confirm button again. Enter form name Test Form and click save.
Table name property must match the name of the table, that will be created in the process where the form will be used!
Using form in a process
To use a form in the process, it must contain a Fill Form node, configured to the created form. At this stage we will assume that a process is already created and a table input_table is already part of the process.
Open a process in a design mode and add new Fill Form node. Open its configuration and select Test Form from the dropdown. For more details on how to do this read Modify a process page.

Configure created form in the process designer.
Save the modified process and close Design mode. Then run new instance of the process. Process should start and then stop in the Fill Form node.
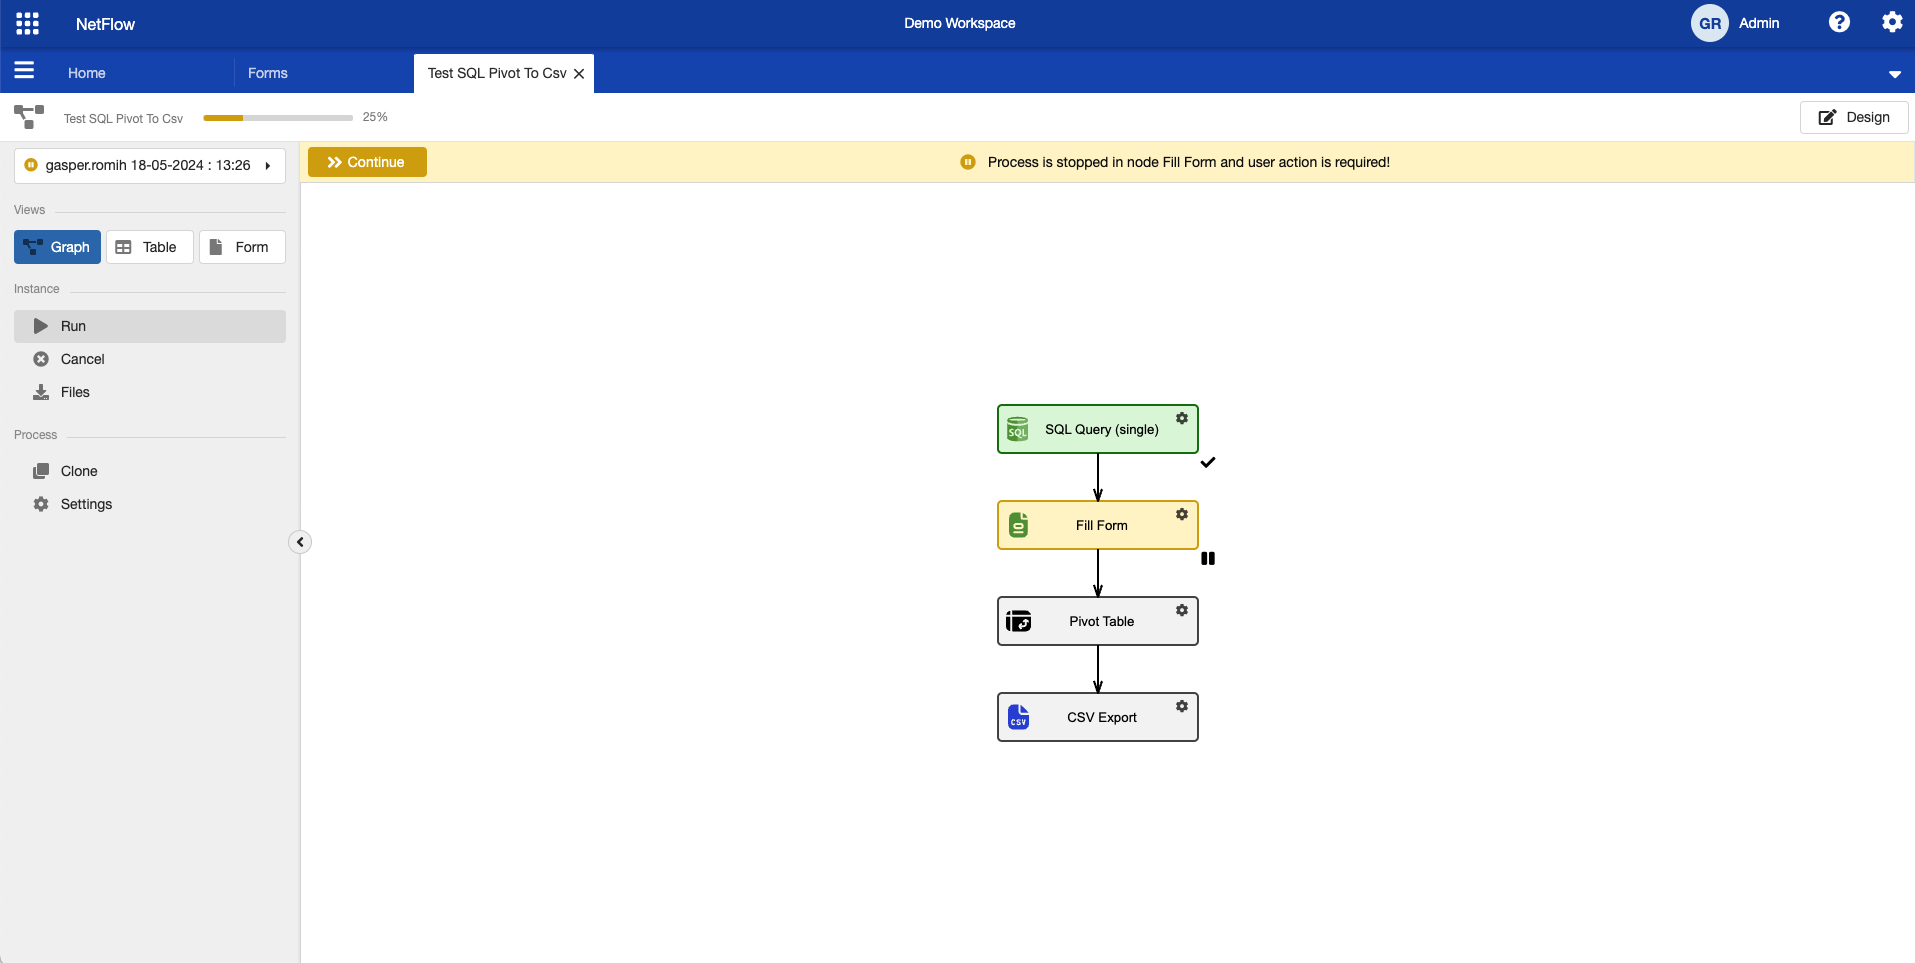
Process stopped at a Fill Form node.
To continue with the process a form needs to be completed. To do so, a form needs to be opened first. To open a form you can either click on ![]() button to open form in pop up, or click on
button to open form in pop up, or click on ![]() button in the Views section.
button in the Views section.
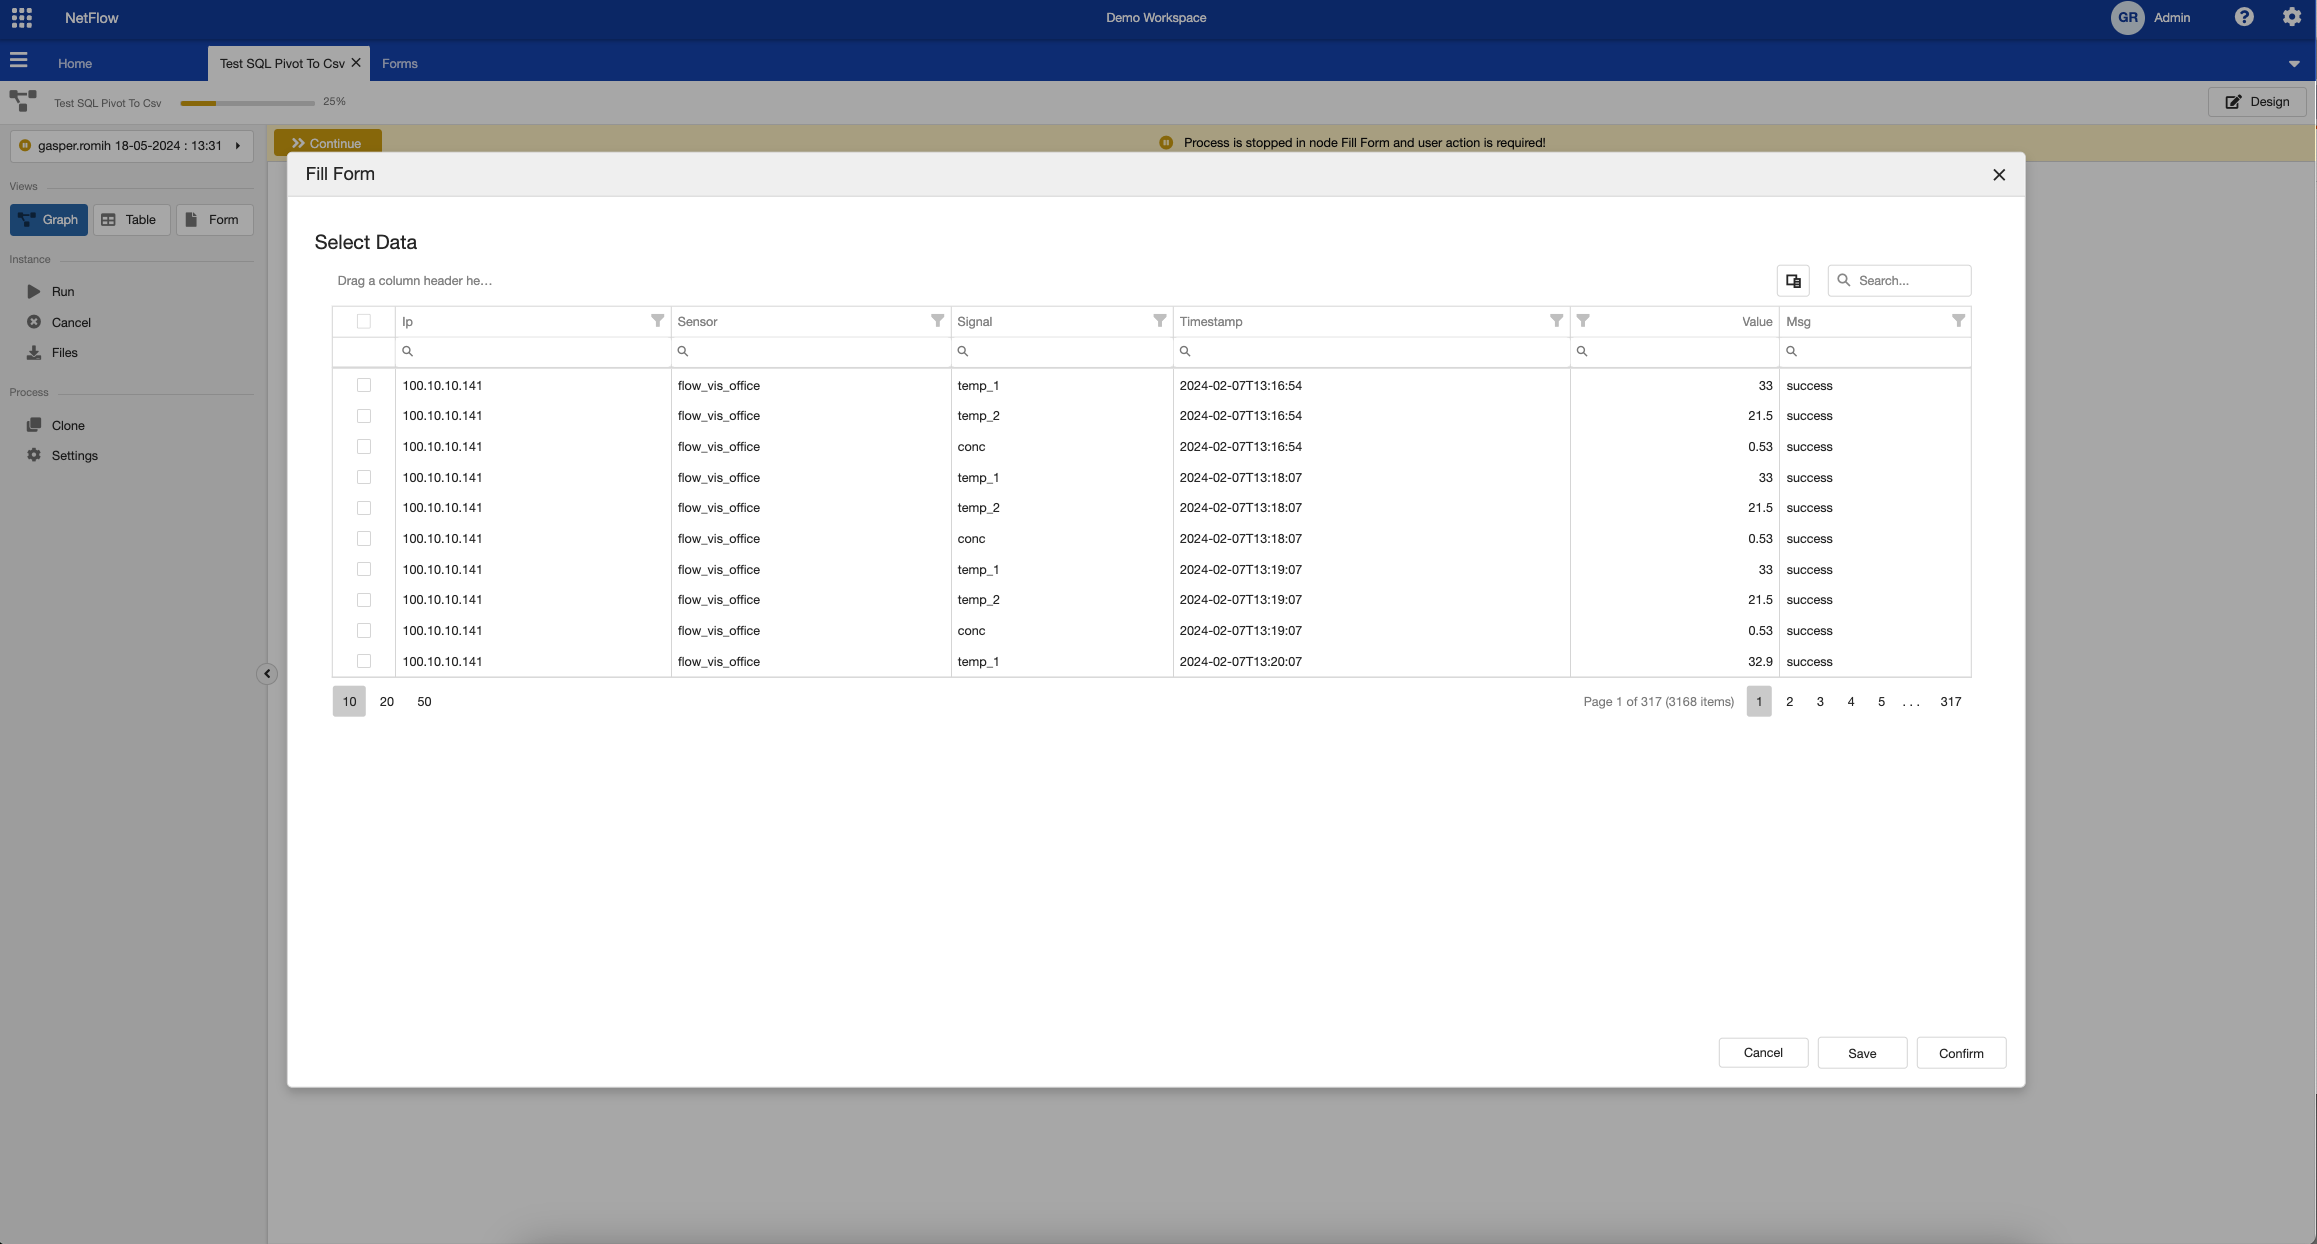
Form in pop up window.
Note that the table offers row selection options. Users can then select some rows (for example which rows to import or transform in latter steps in process) and click on Confirm button. This will complete the form and process should automatically continue with execution. If instead of Confirm button you click on Save button, form inputs are saved, but the process does not continue. This is useful when you dont have enough information to complete the form and would like to come back to it. You can then safely close the application and come back at a latter time.