
Form Designer - Introduction
In this tutorial you will learn:
What is form designer.
How to create basic forms.
How to use form data in latter in process.
At the end of tutorial you should have a working process that gets some data from SQL server that will be offered to user as a selectable table. Next the filtered query with selected rows will be executed and results will be stored as an xlsx file.
Prerequisites:
Access to NetiLab application with sufficient permissions.
Some tables created in SQL Server.
Basic knowladge of NetFlow module.
Basic knowladge of SQL Query Node.
Forms
Forms inside NetFlow are special objects that can be created inside the application. Each form consists of multiple form elements that can either display some information or asks user for some additional input.
Form elements are text inputs, dropdown menus, date chooser, file upload, tree view, datagrids & charts and more. Each form element is assigned an unique id and the values of each element is stored in a process metadata contex and can be used anywhere in the process (other forms, nodes,… that support metadata interaction).
Form designer
Log into application and go into NetFlow module. Expand navigation menu at the left hand side and click Forms.
A new tab with with forms will open up. Depending on your permission you will be able to:
Create a new form.
Modify existing form.
Clone existing form.
We will create a new form. Click on + Add new form button at the top of a table. A form designer popup will open up.
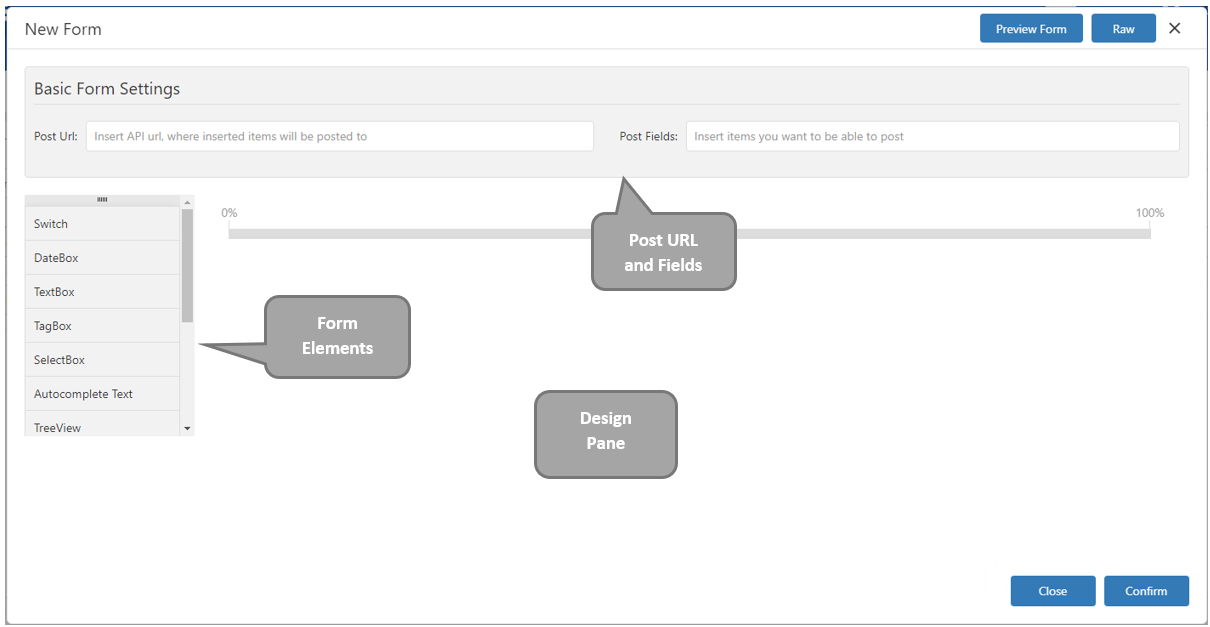
Form designer popup
Form designer consists of:
Form elements, which can be drag & droped in designer pane.
Design pane, which is used to design a form.
Post url and post field, which are used to send form to an external APIs
Adding a form element
To add a new form element into a form drag and drop it into design pane. A preview of an element will be inserted into the form. We will select Advanced Datagrid and drop it into the form.

Preview of Advanced datagrid
Now we need to configure this element. Click on settings icon in right corner of an element will open up the settings for the element.
Fill in:
Entry ID: select_table
Entry Name: Select Data
Expand Initialization Settings and set:
Initialize type: table
Table Name: input_table
Expand Datagrid Settings → Basic Datagrid Settings and turn on Is Data Grid Selectable.
Then click Confirm button and Confirm button again. Enter form name Test Form and click save.